This comprehensive 9th-grade World Geography textbook provides a detailed exploration of global concepts, designed for students to understand physical and human geography principles effectively.
1.1 Overview of the Textbook Structure
The 9th-grade World Geography textbook is structured to provide a balanced exploration of physical and human geography. It begins with an introduction to the field, followed by detailed chapters on Earth’s composition, ecosystems, climate zones, and human-environment interactions. The textbook also delves into cultural diversity, population dynamics, and economic activities, offering a global perspective. Regional studies cover continents like Africa, Asia, Europe, and the Americas, while global issues such as food security and environmental challenges are addressed. The curriculum integrates maps, atlases, and real-world case studies to enhance learning, ensuring students develop essential geographic skills and critical thinking abilities.
1.2 Importance of Studying World Geography
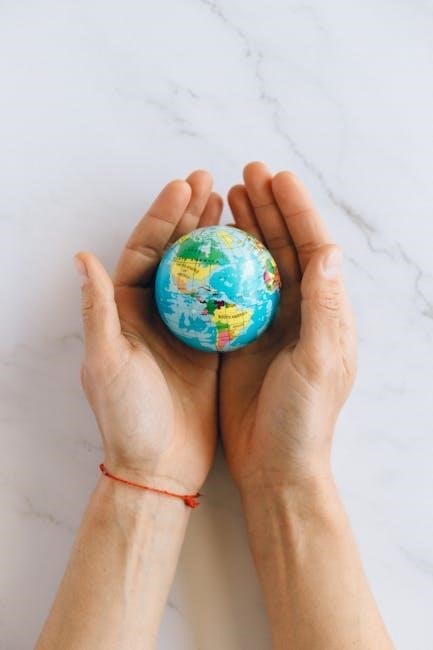
Studying World Geography equips students with essential skills to understand global interconnectedness and cultural diversity. It fosters critical thinking about environmental challenges, economic systems, and social dynamics. By exploring Earth’s composition, climate zones, and ecosystems, students gain insights into sustainable practices. The curriculum also highlights the significance of maps and atlases in analyzing spatial relationships, preparing learners for real-world applications. This knowledge empowers students to address global issues like food security and technological transformations, bridging classroom concepts with practical problem-solving. Ultimately, it cultivates a global perspective, helping students navigate an increasingly interconnected world effectively.
Physical Geography
Physical Geography explores Earth’s structure, ecosystems, climate zones, and human interactions. It emphasizes understanding natural environments and applying geographic knowledge to real-world challenges.
2.1 Earth’s Composition and Structure
The Earth is composed of three main layers: the crust, mantle, and core. These components form the planet’s structure, influencing geological processes and surface features. Understanding Earth’s composition helps students grasp natural phenomena like earthquakes, volcanoes, and plate tectonics. Through detailed diagrams and explanations, the textbook provides insights into the Earth’s internal and external structures, preparing students to analyze environmental interactions and their impact on human activities.
2.2 Ecosystems and Biomes
Ecosystems and biomes are crucial components of Earth’s natural systems. Ecosystems involve interactions between living organisms and their environment, while biomes are large, naturally occurring communities of plants and animals. The textbook explores various biomes, such as forests, deserts, and grasslands, highlighting their unique characteristics and biodiversity. It emphasizes the importance of conservation and sustainability in maintaining these ecosystems. Students learn about the interdependence of species and the impact of human activities on these delicate systems. This section provides a foundation for understanding global environmental challenges and the need for balanced resource management.
2.3 Climate Zones and Their Characteristics
Climate zones are regions with distinct weather patterns, shaped by factors like latitude, altitude, and ocean currents. Major zones include tropical, desert, temperate, and polar. Tropical climates are warm and humid, while deserts are arid with minimal rainfall. Temperate zones have moderate temperatures with seasonal changes, and polar regions are cold and icy. Understanding these zones helps explain global biodiversity and human adaptation strategies. Each climate zone supports unique ecosystems, influencing agriculture, culture, and daily life. This section in the textbook provides a detailed exploration of these characteristics, preparing students to analyze environmental and human interactions effectively.
2.4 Human-Environment Interactions
Human-environment interactions explore how people influence and are influenced by the natural world. Positive impacts include sustainable practices like agriculture and urban planning, while negative effects involve deforestation and pollution. Understanding these interactions is crucial for addressing global challenges like climate change and resource depletion. The textbook emphasizes the importance of balancing human needs with environmental stewardship, ensuring sustainable development for future generations. By studying these dynamics, students gain insights into the interconnectedness of human and physical systems, fostering a deeper appreciation for responsible environmental management and its role in shaping societies worldwide.
Human Geography
Human geography examines the relationship between people, cultures, and environments, focusing on cultural diversity, population dynamics, and economic activities that shape societies and environments globally.
Human geography is the study of how people interact with their environments and each other, focusing on cultural, social, and economic patterns. It explores how human activities shape landscapes, societies, and economies. Key themes include population dynamics, migration, urbanization, and the distribution of resources. By understanding these concepts, students gain insights into global challenges like sustainability, inequality, and globalization. This field emphasizes the interconnectedness of human systems and their impact on the Earth. It prepares learners to address real-world issues by analyzing spatial relationships and cultural contexts, fostering a deeper understanding of our diverse and interconnected world.
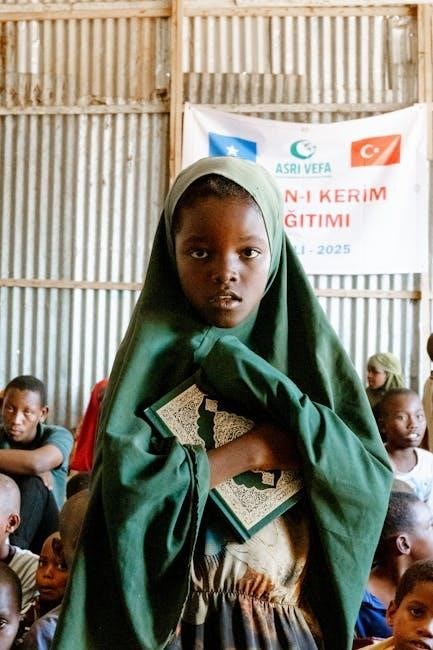
3.2 Cultural Diversity and Traditions
Cultural diversity refers to the variety of human societies, each with unique traditions, languages, and beliefs. This section explores how cultural practices shape identities and communities worldwide. From festivals to customs, these traditions reflect historical and environmental influences. Understanding cultural diversity helps students appreciate the richness of global heritage and fosters empathy; By examining case studies, learners can see how traditions adapt to modern challenges while preserving their essence. This knowledge is vital for addressing global issues and promoting cross-cultural understanding in an increasingly interconnected world.
3.3 Population Dynamics and Migration
Population dynamics involve the study of how human numbers change over time, influenced by birth rates, death rates, and migration patterns. Migration, the movement of people across regions, is driven by factors like economic opportunities, political instability, or environmental changes. Understanding these dynamics is crucial for addressing global challenges, as migration shapes cultural, economic, and social landscapes. This section examines the causes and effects of population shifts, highlighting how they impact communities and nations. By analyzing migration trends, students can better grasp the complexities of global interconnections and their role in shaping the modern world.
3.4 Economic Activities and Development
Economic activities and development are central to understanding how societies function and grow. This section explores various economic systems, from traditional to industrialized, and their impact on global trade. Students learn how resources, labor, and technology drive economic growth. Key topics include agriculture, manufacturing, and service industries, as well as the role of globalization in shaping economies. The chapter also examines challenges like inequality and sustainability, emphasizing the importance of balanced development. By studying these concepts, students gain insights into how economic systems influence daily life and global interconnections, preparing them to address real-world economic challenges effectively.
Regional Geography
This section explores diverse regions worldwide, focusing on Africa, Asia, Europe, North America, South America, Australia, and Oceania. Each region’s unique cultural, physical, and economic characteristics are highlighted.
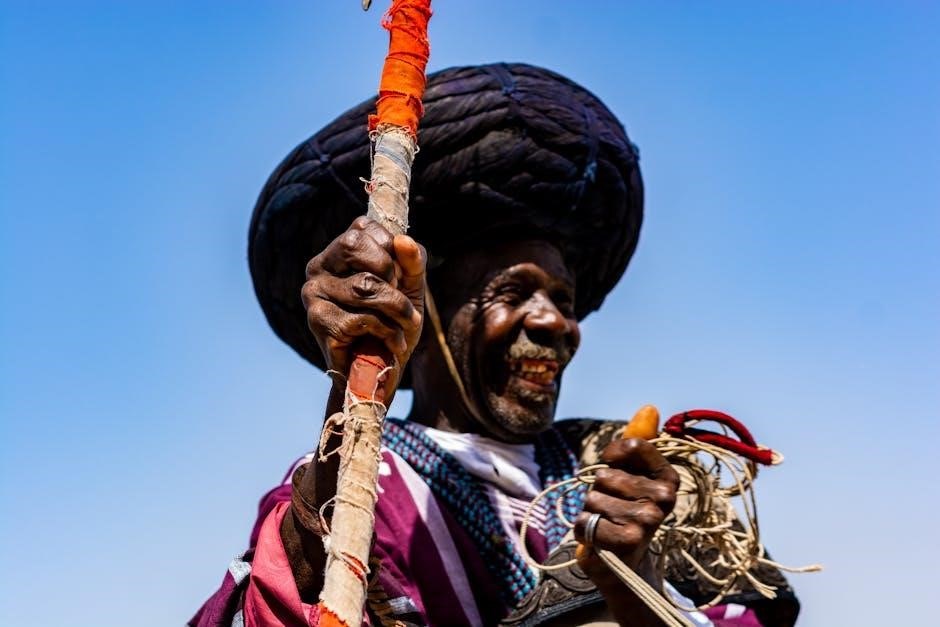
4.1 Africa
Africa, the second-largest continent, is a land of contrasts, featuring vast deserts like the Sahara, the Nile River, and diverse ecosystems. The textbook explores its geographical diversity, from the Atlas Mountains to the savannas teeming with wildlife. Culturally, Africa is home to thousands of languages and ethnic groups, highlighting its rich heritage. The section also delves into the continent’s economic activities, such as agriculture and natural resource extraction, while addressing challenges like environmental degradation and socio-economic disparities. This chapter provides a comprehensive understanding of Africa’s physical and human landscapes, preparing students to appreciate its global significance.
4.2 Asia
Asia, the world’s largest and most populous continent, is characterized by its vast diversity in geography, culture, and economy. The textbook highlights its geographical features, such as the Himalayan mountain range, the Gobi Desert, and the fertile river valleys of the Yangtze and Ganges. Culturally, Asia is home to numerous languages, religions, and traditions, shaped by its long history of civilizations. Economically, countries like China and India play significant roles in global trade and technology. The chapter also explores the challenges of rapid urbanization, population growth, and environmental sustainability, offering insights into Asia’s dynamic and complex landscape.
4.3 Europe
Europe, a continent rich in history and culture, is characterized by its geographical diversity, from the Arctic tundras of the north to the Mediterranean coastlines in the south. The textbook explores its cultural heritage, including the influence of ancient civilizations like Rome and Greece, as well as its role in shaping modern political and economic systems; Europe’s economic significance is highlighted, with the European Union playing a pivotal role in global trade. The chapter also addresses contemporary issues such as migration, sustainability, and the balance between tradition and progress, offering a comprehensive view of Europe’s dynamic landscape and its impact on the world.
4.4 North America
North America, a continent of vast geographical and cultural diversity, encompasses the United States, Canada, Mexico, and the Caribbean. The textbook highlights its ecological richness, featuring landscapes from the Rocky Mountains to the Mississippi River. The region’s cultural identity is shaped by indigenous communities, European colonization, and immigration, creating a mosaic of traditions and languages. Economically, North America is a global powerhouse, driven by innovation, agriculture, and natural resources. Environmental challenges, such as climate change and urbanization, are addressed, alongside efforts to balance development with sustainability, showcasing North America’s complex interplay of nature, culture, and progress.
4.5 South America
South America, a continent of immense biodiversity and cultural richness, is home to iconic landmarks like the Amazon Rainforest and the Andes Mountains. The textbook explores its geographical diversity, from tropical rainforests to arid deserts. Countries like Brazil and Argentina dominate the region economically, with agriculture and natural resources playing key roles. Cultural heritage is deeply influenced by indigenous traditions, European colonization, and African diaspora. Environmental challenges, such as deforestation and climate change, are addressed alongside efforts to preserve its unique ecosystems. South America’s dynamic blend of nature, culture, and economy makes it a fascinating region for study and exploration.
4.6 Australia and Oceania
Australia and Oceania, comprising a continent and a vast array of Pacific Islands, showcase unique geographical and cultural diversity. Australia, known for its vast Outback and distinctive wildlife, contrasts with the lush, tropical environments of Oceania. The region’s ecosystems range from coral reefs to rainforests, supporting rich biodiversity. Culturally, Australia reflects its Aboriginal heritage alongside European influences, while Pacific Island nations maintain vibrant traditions shaped by indigenous customs and colonial histories. Economic activities vary, with Australia leading in mining and agriculture, and Pacific Islands relying on fishing and tourism. Environmental challenges, such as climate change and coastal erosion, loom large for these island nations.

Global Issues
Exploring food security, sustainability, and environmental challenges, this section highlights the interconnectedness of global problems and their impact on human and physical geography, urging sustainable solutions.
5.1 Food Security and Sustainability
Food security and sustainability are critical global issues, focusing on ensuring access to nutritious food while maintaining environmental health. The United Nations emphasizes reducing hunger and improving agricultural practices. Climate change, population growth, and resource depletion threaten food systems, requiring innovative solutions. Sustainable farming, water conservation, and reducing food waste are essential strategies. This section explores how geography influences food production and distribution, highlighting the need for equitable access and environmental stewardship. Understanding these challenges helps students appreciate the interconnectedness of food systems and global well-being, encouraging sustainable practices for future generations.
5.2 Environmental Challenges
Environmental challenges such as climate change, deforestation, and pollution impact ecosystems and human societies globally. The textbook addresses these issues, emphasizing the role of human activities in exacerbating environmental problems. It explores how climate change affects biodiversity, sea levels, and weather patterns, while also discussing the importance of conservation efforts. Students learn about sustainable practices and international agreements aimed at mitigating environmental damage. This section highlights the interconnectedness of environmental health and economic development, encouraging students to think critically about their role in preserving the planet for future generations.
5.3 Technological Transformations
Technological transformations have revolutionized how we interact with and understand the world. The textbook explores advancements in Geographic Information Systems (GIS) and remote sensing, enabling precise mapping and environmental monitoring. Digital tools like online atlases and educational platforms enhance learning, making complex data accessible. These technologies bridge classroom studies with real-world applications, fostering innovation and problem-solving skills. By integrating technology, the curriculum prepares students to navigate a rapidly changing global landscape, emphasizing the importance of adaptability and digital literacy in modern geography.

Maps and Atlases
Maps and atlases are essential tools in geography, providing visual representations of the world. This section explores how they aid in regional studies and skill development, such as identifying political boundaries and climate zones, while fostering spatial awareness and real-world problem-solving abilities.
6.1 Importance of Maps in Geography
Maps are fundamental tools in geography, offering visual representations of the world. They help students understand spatial relationships, such as the location of countries, climate zones, and natural features. By analyzing maps, learners can identify patterns, like the distribution of ecosystems or the impact of human activities on the environment. Maps also enhance critical thinking and problem-solving skills, enabling students to connect classroom concepts to real-world scenarios. Atlases, collections of maps, provide comprehensive views of regions, aiding in comparative studies and fostering a deeper appreciation of global diversity and interconnections.
6.2 Using Atlases for Regional Studies
Atlases are invaluable resources for regional studies, offering detailed maps and insights into geographic, cultural, and economic aspects of various regions. They provide a visual and organized way to explore specific areas, such as Africa, Asia, or Europe, highlighting key features like climate zones, natural resources, and population distribution. Atlases also include thematic maps, which help students analyze patterns like food security or environmental challenges. By comparing regions, learners can identify similarities and differences, fostering a deeper understanding of global diversity. Atlases thus serve as essential tools for connecting textbook concepts to real-world regional studies, making complex information accessible and engaging for students.
Case Studies and Real-World Applications
Case studies connect classroom learning to real-world scenarios, enabling students to apply geographic concepts to current global challenges like climate change and economic development through practical examples.
7;1 Applying Geographic Knowledge
Applying geographic knowledge involves using concepts like climate zones, ecosystems, and cultural diversity to analyze real-world issues. Students explore how human activities impact the environment and economies, fostering critical thinking. By connecting classroom lessons to practical examples, they develop problem-solving skills. This approach helps students understand global interconnections and prepares them for future challenges. Real-world applications of geography are essential for addressing issues like food security and sustainable development, making the subject relevant and engaging for ninth-grade learners. This integration enhances their ability to contribute meaningfully to societal and environmental solutions.
7.2 Connecting Classroom to Real-World Activities
Linking classroom lessons to real-world scenarios helps students see the practical relevance of geography. By analyzing case studies and current events, they apply theoretical concepts to actual problems. Activities such as mapping climate changes or studying urbanization patterns bridge academic learning with real-life applications. This approach fosters a deeper understanding and prepares students to address global challenges effectively. Interactive projects and discussions further enhance their ability to connect geographic knowledge to everyday situations, making learning dynamic and meaningful. This connection is vital for developing informed and engaged global citizens in the ninth grade.

Skills Development
This section focuses on enhancing critical thinking and problem-solving abilities through Geographic Information Systems (GIS) and real-world applications, preparing students for global challenges.
8.1 Geographic Information Systems (GIS)
Geographic Information Systems (GIS) are powerful tools that combine mapping technologies with spatial data analysis. Students learn to use GIS to explore and visualize geographic patterns, relationships, and trends. By integrating mapping tools with real-world data, GIS helps in understanding complex issues like urban planning, environmental conservation, and resource management. This section equips learners with skills to analyze data, create maps, and solve geographic problems. Practical applications include studying climate zones, population dynamics, and economic activities. GIS enhances critical thinking and prepares students for careers in geography, urban planning, and environmental science.
8.2 Critical Thinking and Problem Solving
Critical thinking and problem-solving skills are essential for understanding complex geographic issues. Students learn to analyze data, evaluate sources, and draw meaningful conclusions. Real-world applications, such as addressing food security and environmental challenges, encourage learners to think innovatively. By connecting classroom concepts to practical scenarios, students develop the ability to approach problems systematically. This section emphasizes the importance of analytical thinking in geography, preparing students to tackle global issues effectively. Skills acquired include interpreting maps, assessing ecosystems, and proposing sustainable solutions, fostering a deeper understanding of the world and its interconnected systems.
The 9th-grade World Geography textbook offers a comprehensive exploration of global concepts, fostering a deeper understanding of the world and its complexities.
9.1 Summary of Key Concepts
The 9th-grade World Geography textbook covers essential topics, integrating physical and human geography. It explores Earth’s composition, ecosystems, climate zones, and human-environment interactions. Cultural diversity, population dynamics, and economic activities are highlighted, along with regional studies of continents like Africa, Asia, and the Americas. The textbook addresses global issues such as food security, environmental challenges, and technological transformations, emphasizing real-world applications. Skills like GIS and critical thinking are introduced to enhance problem-solving abilities. By connecting classroom learning to global scenarios, the textbook equips students with a comprehensive understanding of the world and its interconnected systems, fostering informed and engaged global citizens.
9.2 Reflecting on the Importance of Geography
Studying geography fosters a deeper understanding of the world’s physical and human landscapes, enabling students to appreciate the interconnectedness of ecosystems, cultures, and economies. By exploring global issues like climate change and food security, students develop critical thinking skills to address real-world challenges. Geography also promotes cultural awareness, encouraging empathy and cooperation in an increasingly interconnected world. This subject equips students with the tools to navigate complex environmental and societal problems, preparing them to contribute meaningfully as informed global citizens. Ultimately, geography bridges the gap between classroom learning and real-world applications, inspiring a lifelong curiosity about our ever-changing planet.