Loom knitting offers a versatile and accessible way to create various stitches, ideal for beginners and experienced crafters alike․ With pegs acting as a framework, it simplifies stitch formation, making it easier to craft scarves, hats, and blankets without dropping stitches․ This method provides a rhythmic, almost calming experience, allowing crafters to explore a wide range of patterns and techniques with ease․
What is Loom Knitting?
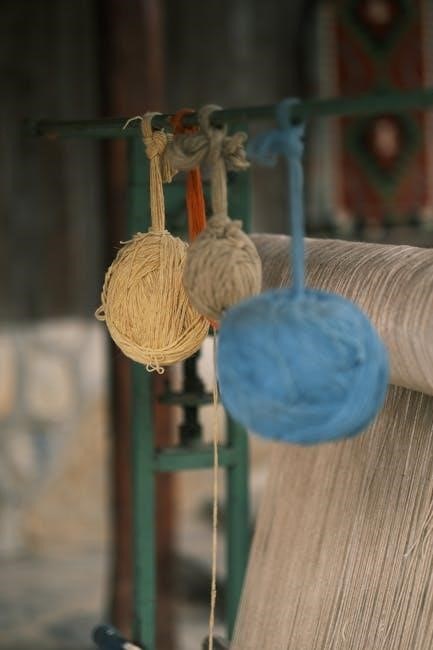
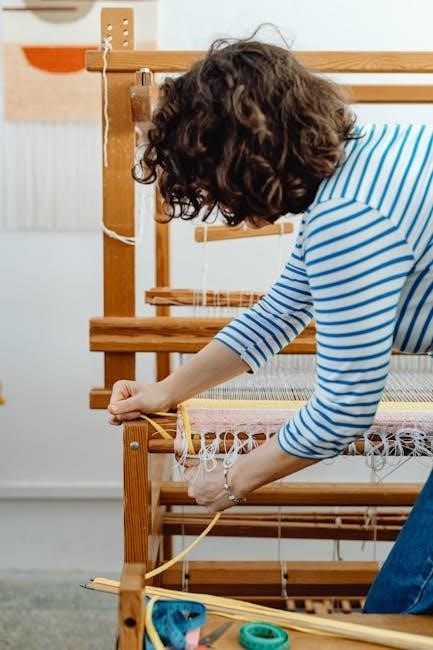
Loom knitting is a versatile and accessible method of creating fabric using a knitting loom, which features a series of pegs arranged in a frame․ Unlike traditional knitting needles, loom knitting simplifies the process by holding the stitches on the pegs, making it easier to manage and reduce errors․ This technique is ideal for crafters of all skill levels, from beginners to experienced knitters, as it allows for a wide range of stitch patterns and project types, such as scarves, hats, blankets, and even socks․ The structured framework of the loom makes it easier to maintain consistency and explore creative designs, making it a popular choice for those looking to expand their knitting skills․
Why Choose Loom Knitting Over Traditional Knitting Needles?
Loom knitting offers several advantages over traditional knitting needles, making it an appealing choice for many crafters․ The structured frame of the loom simplifies stitch formation, reducing the risk of dropped stitches and making it easier to maintain consistency․ This method is particularly beneficial for beginners, as it requires less manual dexterity and coordination compared to handling two needles․ Additionally, loom knitting allows for efficient project completion, as the pegs hold the stitches in place, minimizing errors and allowing for a more meditative crafting experience․ Its versatility supports a wide range of stitch patterns and projects, from simple scarves to intricate designs, making it a preferred tool for both casual and dedicated knitters․
Basic Loom Knitting Stitches
Mastering basic loom knitting stitches is essential for any crafter․ The knit stitch, purl stitch, and flat stitch are simple yet foundational, allowing you to create versatile patterns with ease․
Knit Stitch (K)
The knit stitch (K) is a fundamental technique in loom knitting, forming the basis of countless patterns․ To create a knit stitch, wrap the yarn around the loom peg in a specific manner, ensuring the stitch lies flat and even․ This stitch is essential for beginners, as it teaches the core movement of yarn manipulation on a loom․ Mastery of the knit stitch allows crafters to explore more complex patterns and designs․ It is versatile and commonly used in projects like scarves, hats, and blankets․ By practicing the knit stitch, you’ll build a solid foundation for advanced loom knitting techniques․ Start with this stitch to understand the rhythm and flow of loom knitting․
Flat Stitch (F)
The Flat Stitch (F) is a simple yet versatile stitch in loom knitting, creating a smooth, even texture․ It’s often used in projects requiring a flat surface, such as scarves or blankets․ To achieve this stitch, yarn is worked in a specific pattern around the loom pegs, ensuring a consistent and flat fabric․ The Flat Stitch is ideal for beginners, as it builds on the basic knit stitch with slight variations․ This stitch is also a great way to practice yarn tension and stitch alignment․ By mastering the Flat Stitch, crafters can explore more intricate patterns and enhance their loom knitting skills․ It’s a foundational stitch that offers both simplicity and versatility for various projects․
Purl Stitch (P)
The Purl Stitch (P) is a fundamental stitch in loom knitting, creating a textured fabric with a soft, ridged surface․ It is worked similarly to traditional knitting but adapted for loom use․ By looping the yarn in a specific direction around the pegs, the Purl Stitch adds depth and visual interest to projects․ It is often paired with the Knit Stitch to create intricate patterns like ribbing․ The Purl Stitch is ideal for projects such as hats, scarves, and blankets, where a textured look is desired․ Mastering this stitch enhances versatility in loom knitting, allowing crafters to explore a wide range of designs․ It is a essential skill for achieving professional-looking results in various knitting projects․
Single Knitting Techniques
Single knitting techniques, like EWrap (EW) and No Wrap Stitch (NW), simplify stitch creation on a loom, making projects such as scarves and hats easier for beginners to master․
EWrap (EW)
The EWrap (EW) stitch is a fundamental single knitting technique in loom knitting, often considered the first stitch many learners master․ It involves wrapping the yarn around the peg in a figure-eight pattern, creating a smooth, fabric-like texture․ This stitch is versatile and ideal for beginners, as it forms the foundation for more complex patterns․ The EWrap stitch is perfect for projects like scarves, hats, and blankets, offering a clean and even appearance․ Its simplicity makes it a great starting point for those new to loom knitting, while its reliability ensures consistent results․ Tutorials and PDF guides often highlight the EWrap stitch as an essential skill to master before exploring advanced techniques․
No Wrap Stitch (NW)
The No Wrap Stitch (NW) is a single knitting technique that contrasts with the EWrap (EW) by eliminating the figure-eight yarn wrapping․ This stitch is ideal for crafters seeking a softer drape in their projects, such as scarves or shawls․ The NW stitch is worked by moving the yarn directly from one peg to the next without wrapping, resulting in a texture that is less bulky compared to the EWrap․ It’s a great option for beginners, as it requires minimal yarn manipulation and offers a smooth, even fabric․ The NW stitch is often used interchangeably with the EWrap, allowing crafters to achieve varied results depending on the desired project outcome․ This stitch is a foundational skill that enhances versatility in loom knitting․
Double Knitting Techniques
Double knitting on a loom creates two layers simultaneously, offering thickness and warmth․ Perfect for projects like blankets or socks, this method enhances texture and durability with ease․
Basket Weave Stitch
The Basket Weave Stitch is a popular choice for loom knitting, creating a textured, woven appearance reminiscent of traditional basket patterns․ This stitch combines alternating knit and purl rows to form a visually appealing design․ It is ideal for creating blankets, scarves, and home decor items․ The pattern involves working two rows of knits followed by two rows of purls, repeating this sequence to achieve the desired texture․ This stitch is versatile and works well with various yarn types, making it suitable for both beginners and advanced crafters․ The Basket Weave Stitch adds a classic, timeless touch to any project․
Celtic Knot Stitch
The Celtic Knot Stitch is a visually striking pattern that mimics the intricate, interconnected designs of traditional Celtic art․ This stitch creates a woven, knot-like appearance by alternating knit and purl rows in a specific sequence․ It is often used to add an elegant, timeless touch to projects like scarves, hats, and blankets․ The Celtic Knot Stitch requires attention to detail, as it involves working multiple wraps and rows to achieve the desired interlaced effect․ This stitch is ideal for crafters looking to add a touch of cultural heritage to their work․ Patterns and tutorials are widely available, making it accessible to both beginners and advanced knitters․
Advanced Loom Knitting Stitches
Advanced loom knitting stitches, like the Andalusian and Bamboo Stitch, offer intricate textures and patterns for experienced crafters․ These stitches require precision and practice to master, creating beautiful, complex designs perfect for sophisticated projects․
Andalusian Stitch
The Andalusian Stitch is an intricate and advanced loom knitting pattern that creates a textured, multi-row design․ It combines knit and purl stitches in a specific sequence to produce a fabric with depth and visual interest․ This stitch is ideal for experienced crafters looking to add complexity to their projects․ The Andalusian Stitch is reversible, making it perfect for scarves, shawls, and blankets where both sides are visible․ Its unique texture adds a professional finish to any garment or home decor item․ While it requires careful attention to pattern repetition, the rewarding results make it a favorite among skilled loom knitters seeking to elevate their creations․
Bamboo Stitch
The Bamboo Stitch is a versatile and textured loom knitting pattern that creates a fabric with subtle vertical ribbing․ It is an intermediate-level stitch that combines knit and purl stitches in a specific sequence to achieve its unique look․ This stitch is ideal for projects requiring a balanced texture without bulk, such as scarves, hats, or blankets․ The Bamboo Stitch works well with a variety of yarn weights and is reversible, making it suitable for garments where both sides are visible․ While it may require careful attention to stitch repetition, the resulting fabric is lightweight and visually appealing․ This stitch is a popular choice among loom knitters looking to add texture and interest to their creations․
Diamond Lace Stitch
The Diamond Lace Stitch is a beautiful and intricate pattern in loom knitting, creating an open, airy fabric with a delicate diamond-shaped design․ This stitch is perfect for projects requiring a light, lacy texture, such as shawls, scarves, or lace edgings․ It involves a combination of knit, purl, and yarn-over stitches, worked in a specific sequence to form the diamond motif․ While it is considered an advanced stitch, crafters with experience in basic loom knitting techniques can master it with patience․ The Diamond Lace Stitch adds elegance to any project and is particularly popular for spring and summer knits․ Proper yarn choice and tension are key to achieving the desired drape and structure of this stitch․
Pattern Libraries and Resources
Loom knitting pattern libraries and resources offer a wealth of stitch guides, tutorials, and free PDF downloads․ Explore collections like the Loom Knit Stitch Pattern Library for inspiration and step-by-step instructions, perfect for mastering various techniques and discovering new designs to enhance your projects․
Loom Knit Stitch Pattern Library
The Loom Knit Stitch Pattern Library is a comprehensive resource for crafters, offering a wide variety of stitches and techniques․ From basic knit and purl stitches to advanced patterns like the Andalusian and Bamboo stitches, this library provides detailed instructions and visual guides․ Many patterns include tutorial videos, making it easier for beginners to learn․ The library also features collections like the Basket Weave and Celtic Knot stitches, perfect for creating intricate designs․ With free PDF downloads and step-by-step tutorials, crafters can explore new stitches and expand their skills․ Whether you’re making scarves, hats, or blankets, this library is a go-to for inspiration and guidance, catering to both beginners and experienced knitters alike․

Free Loom Knitting Patterns and Tutorials
Free loom knitting patterns and tutorials are widely available online, offering crafters a wealth of resources to learn and create․ These patterns often include step-by-step guides, photos, and videos, making it easy for beginners to master various stitches․ Many tutorials cover essential techniques like the knit, purl, and wrap stitches, while others focus on advanced methods such as double knitting and lace patterns․ Websites and communities provide access to downloadable PDFs, ensuring crafters can practice at their own pace․ These free resources are ideal for those looking to explore new stitches or refine their skills without additional costs․ They cater to both beginners and experienced knitters, fostering creativity and skill development in the loom knitting community․
Tips for Mastering Loom Knitting Stitches
Consistent practice and patience are key to mastering loom knitting stitches․ Use tutorial videos for guidance, maintain even tension, and experiment with patterns to refine your skills․
Practice and Consistency
Mastering loom knitting stitches requires dedicated practice and consistency․ Regular practice helps develop muscle memory, ensuring even tension and smooth stitch formation․ Start with basic stitches like the knit and purl, gradually progressing to more complex patterns․ Consistency in technique prevents common errors and enhances the quality of your projects․ Set aside time each day to practice, even if briefly, to build confidence and skill․ Over time, consistent effort will make intricate stitches second nature, allowing you to explore a wide range of creative possibilities with ease and precision․
Using Tutorial Videos for Guidance
Tutorial videos are an invaluable resource for mastering loom knitting stitches․ They provide step-by-step visual guidance, making it easier to understand complex techniques․ Many patterns, such as the eyelet stitch and lace stitch, are accompanied by video tutorials that demonstrate proper yarn handling and stitch formation․ These videos often include close-ups and slow-motion replays, ensuring clarity for learners․ Platforms like YouTube and dedicated crafting websites offer a wealth of free content, catering to both beginners and advanced crafters․ By following along with these tutorials, you can refine your skills, troubleshoot common mistakes, and confidently explore a variety of stitches and patterns․ This visual learning approach enhances the learning process and fosters creativity in your projects․
Popular Loom Knitting Projects
Loom knitting is perfect for creating scarves, hats, blankets, and socks․ It’s also ideal for crafting cowls, baby items, and home decor, offering versatility for crafters of all levels․
Scarves and Hats
Scarves and hats are among the most popular loom knitting projects, offering quick and rewarding results․ They are ideal for beginners, as they require minimal shaping and seaming․ The rhythmic nature of loom knitting makes these projects enjoyable and meditative․ Scarves can be crafted in various lengths and textures, while hats provide a practical way to practice stitch patterns․ Both projects are perfect for experimenting with different yarns and stitches, allowing crafters to create personalized accessories․ They are also great for gifting, making them a favorite among loom knitters of all skill levels․ These projects are excellent for mastering basic stitches while producing something useful and stylish․
Blankets and Socks
Blankets and socks are popular loom knitting projects that showcase versatility and creativity․ Blankets are ideal for practicing intricate stitches like the Basket Weave or Celtic Knot, creating textured, cozy designs․ Socks, while requiring more precision, allow for customization in fit and style․ Both projects benefit from the loom’s ability to work in the round, eliminating seams․ Blankets are perfect for experimenting with yarn weights and colors, while socks provide a practical way to master techniques like the Purl Stitch and EWrap․ These projects are rewarding for both beginners and experienced knitters, offering a sense of accomplishment and practical use․ They exemplify the adaptability of loom knitting for both home decor and wearable items․
Loom knitting stitches offer endless creativity and versatility, making it an enjoyable craft for all skill levels․ From scarves to blankets, the possibilities are vast and rewarding, encouraging continuous exploration and mastery of new techniques․